• Welcome aboard HomebuiltAirplanes.com, your destination for connecting with a thriving community of more than 10,000 active members, all passionate about home-built aviation. Dive into our comprehensive repository of knowledge, exchange technical insights, arrange get-togethers, and trade aircrafts/parts with like-minded enthusiasts. Unearth a wide-ranging collection of general and kit plane aviation subjects, enriched with engaging imagery, in-depth technical manuals, and rare archives.

    For a nominal fee of $99.99/year or $12.99/month, you can immerse yourself in this dynamic community and unparalleled treasure-trove of aviation knowledge.

    Embark on your journey now!

    Click Here to Become a Premium Member and Experience Homebuilt Airplanes to the Fullest!

Sonerai One - Serial Number 012412-1179

This site may earn a commission from merchant affiliate links, including eBay, Amazon, and others.
My Sonerai 1, N14CT, Cought fire in flight with builder Charlie Terry at the controls. He was testing a tuned exhaust. He got it on the ground, but it burned, and was not re-built, until fast fwd. to now, and I am restoring the racer.
'I' use a chop saw or hack saw to get the length close, a pair of tinsnips to rough notch tubes, then a radiused Grinding wheel to get them very close. With gas welding, fits are not as important as TIG welding....ED
 
Worked on a few items this weekend.

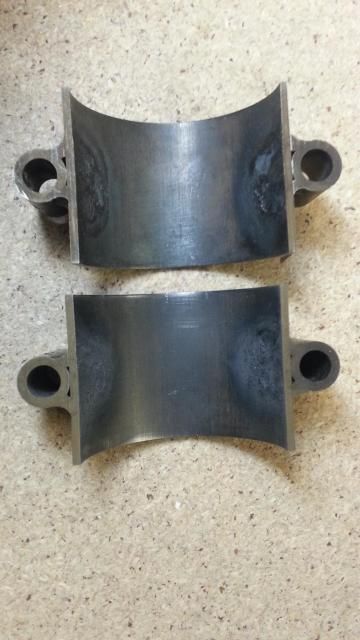
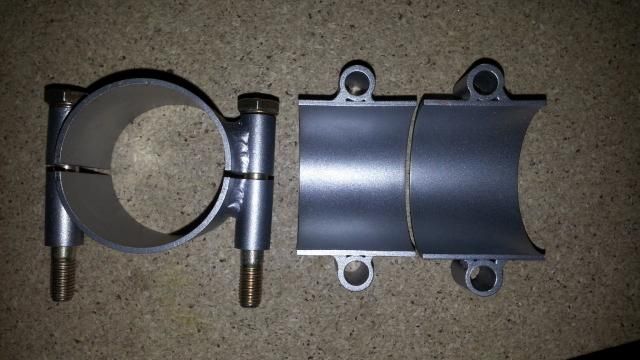
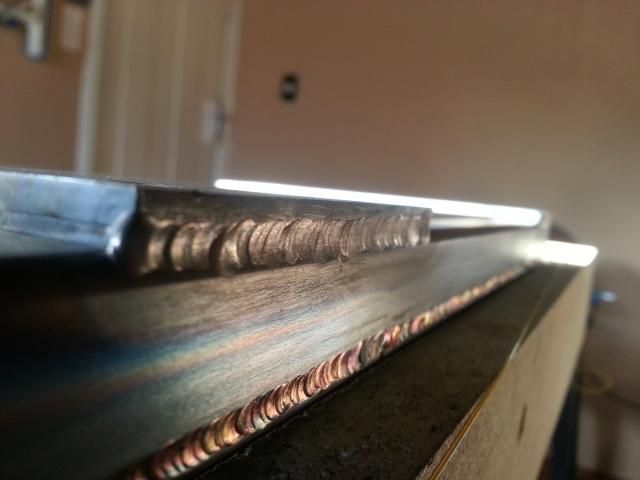
The wing folding brackets came out looking like this:


After pushing the elevator / Aileron Torque bearings aside a few times out of FEAR, I decided to climb in and get them out the way. The welding caused some distortion, and the slag on the inside made them look far worse than they actually were. I was also fearful of cutting them in half on my little band saw. Could I get them straight? (Would it matter, since they would be a matched pair?)
Straightening them wasn't not nearly as difficult as them seemed, and I cheated and had them split on a wire cutter. Shot blasting them cleans things up nicely too.
They were actually really fun and rewarding to make.


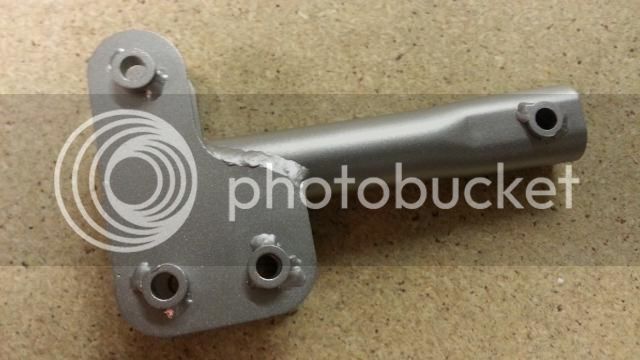
The elevator Idler also got some attention this weekend.
The holes were drilled out after welding to accept the AN-3 bolts. I'm not sure If I am supposed to have paint in the holes. I had planned to drill the paint out, and rely on either Petroleum jelly or an oil of sorts to prevent rust. Anyone have any ideas or suggestions?
Hopefully! if my kids allow, i'll get some Zinc Chromate on this evening.

 
When I paint a small control system part that has bushings, I final ream the holes after painting. What I use is whiite lithium grease in the bushings, but that's just because I had it handy. I suppose any grease would work....ED
 
It's been a while since I updated this.
Work on my S1 didn't stop, but it slowed a lot while we delt with some business expansion issues.
You know ..... life happened!

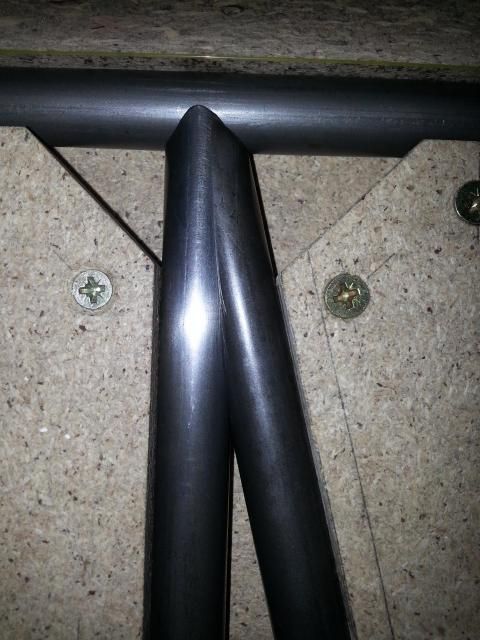
Anyway .... I started notching tubes for the fuselage truss using a 5/8" Dremel sanding drum. It worked ok, but took around an hour or so to complete a notch. The finish and fit was pretty good, but I couldn't get a 3/4" sanding drum for the bigger tubes. Man! ..... There had to be a way to make this go faster!

Shopping time!
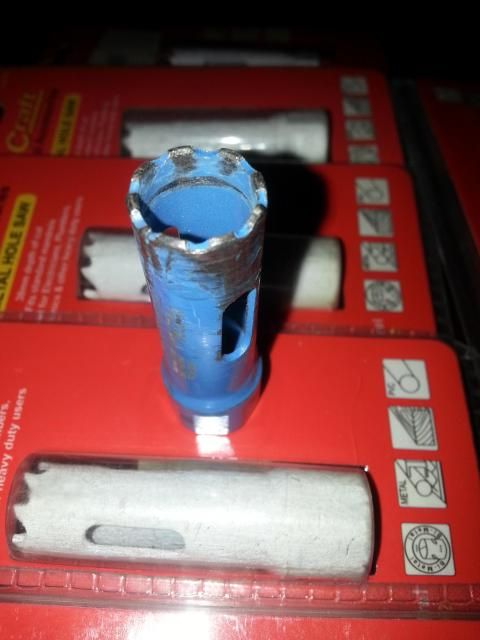
I read about all of these hole saw type notchers. The guys that had them ranted about them, so I ordered one from Aircraft Spruce and waited two weeks for it to be delivered. I couldn't wait!!! I was so excited .... you know, like a chick in a shoe store!
When it arrived, the box seemed a bit smaller than what I expected, but hey! ..... this was it! The OL JOINT JIGGER!!! Whoooo HOOOO!!!!


The general quality of the tool is pretty good. Nice anodized aluminium finish. I would rate it about 8/10.
I really didn't want to get it dirty, but I had to give it a go. I fitted a hole saw, clamped a tube into the thing, and spun the drill up! An impressive plume of white smoke appeared as the oil on the inside of the tube burned away. The drill started to jump around, as the teeth sheered off the hole saw. It got worse, it didn't notch the tube, but rather kind of ripped it up. The finish was bad ... to be polite.
OH F@#K!!!


One hole saw per notch. This was going to be expensive. I went to the local hardware, and bought all of the 5/8" hole saws they had in stock.... like twelve of them. After hours of experimenting, I couldn't get a neat, well finished notch. The teeth on the hole saw seemed to be way to course for the thin walled tubing I was trying to notch. Nobody said that in any of the reviews I read. I gave it up as a bad idea and sulked for a few weeks.

If you are looking to build a roll cage for your wives car, it may suffice. But don't waste your time or money if you want to notch thin walled aircraft tubing.

Back to the drawing board!
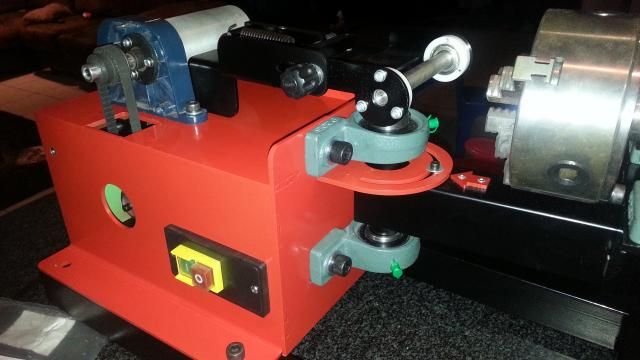
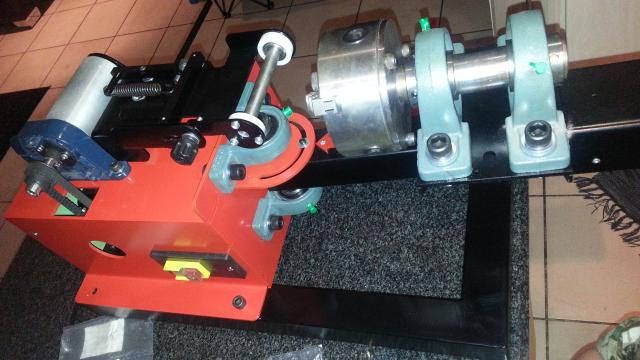
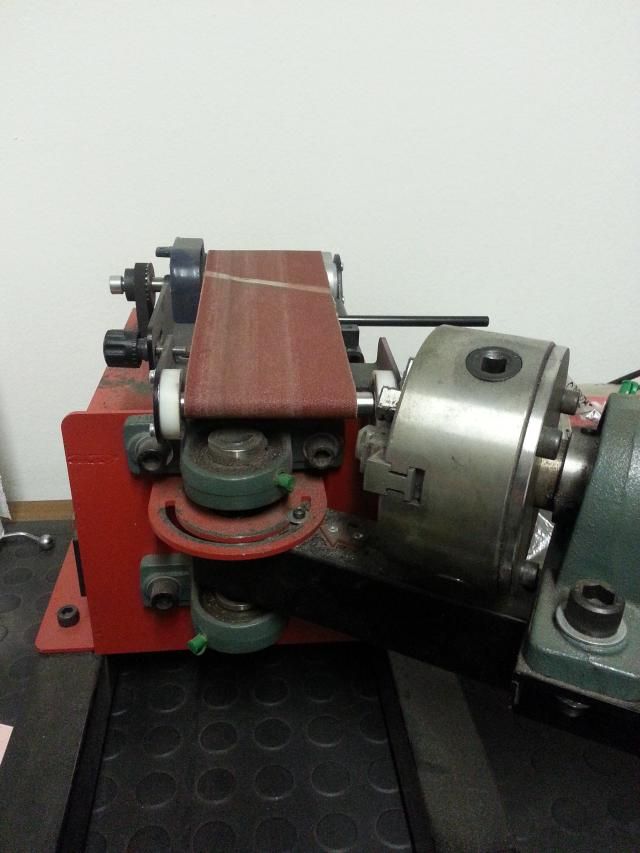
Three months later, this baby emerged:


The tube is clamped in a lathe chuck and can be rotated to notch the tube on both sides. The notching is done by a sanding belt. I made two rollers to suit the two different sizes of tube I will be notching. It works pretty well and can cut a notch in about a minute and a half. Mission accomplished!!!

WAIT A MINUTE!
I could have notched all of the tubing for the entire fuselage with a Dremel in less than three months!
What a waste of time!!!!
Ahhh! ..... I enjoyed it anyway!


The fist of the two fuselage sides is ready to be tacked together.
If you didn't fuss around to much, one could probably accomplish this in a week or two.
It took me around four months. Don't get me wrong! ..... it was loads of fun.

some pics:


The metal workers have gone on strike here in South Africa and I've had to close up my workshop and send the staff home early. We have been forced out four working days in a row, so maybe it's time to head the warnings and stay away for a few days before things get violent as they do over here. I had hoped that the cold weather today would make the strikers re-think their demands, but that wasn't the case. We don't have any union members under our employ, but the intimidation, and threat of violence is becoming intolerable. Thugs!

So! .... what now? I'm bored sitting at home.
Being able to eat lunch at a different restaurant each day with my lovely wife has been fantastic. I have even been able to pick the kids up from school which I never get to do. Seeing their smiles of surprise when they see dad at the fence each day has been truly wonderful!

There has even been time to work on my Sonerai.

The Main Spar Carry Though components were cut a few months ago, but were put aside because I had no idea of how to put the thing together accurately. [yes .... I was scared of it]
As always, it wasn't that difficult.
Firstly, a small confession ... [blush] .... I cheated!
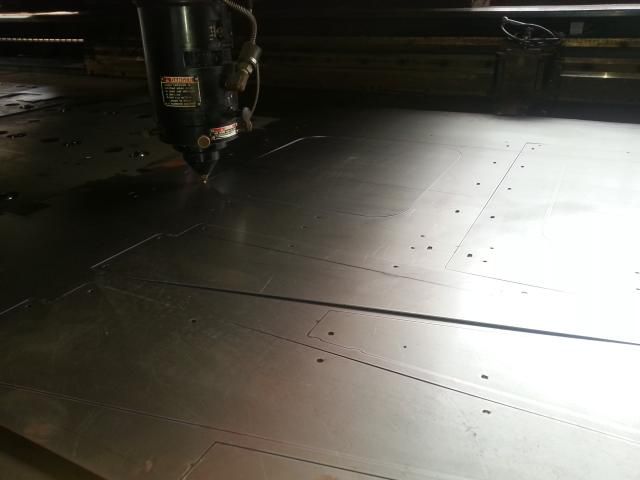
All of the parts were laser cut. The front and rear cap plates, the spacers, and the rear plate. Even though they were laser cut, and the finish was pretty good to start with, I still spent a few hours cleaning them up by blasting them with a fine glass bead. [brainless, but therapeutic in its own way]

Assembly of the cap plates ....
Some sort of jig .... thing .... spacer was required to keep the spacers parallel when welding.
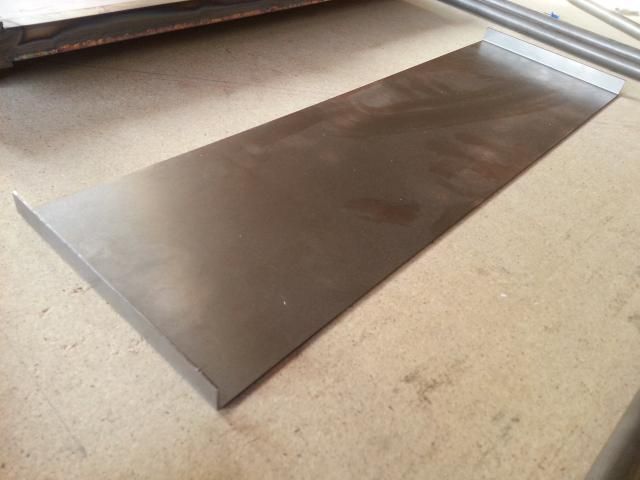
I started by cutting a sheet of regular mild steel plate to the width of 6". I bent the ends up, you'll see why later.
Jig .... thing ... spacer done. (this was also laser cut ... [blush] - lazy guy with no skills!)


The above plate was used for two things, firstly to tack the spacer plates to the cap plates and keep the spacers parallel to each other, and later to tack the square tubes to the plates.


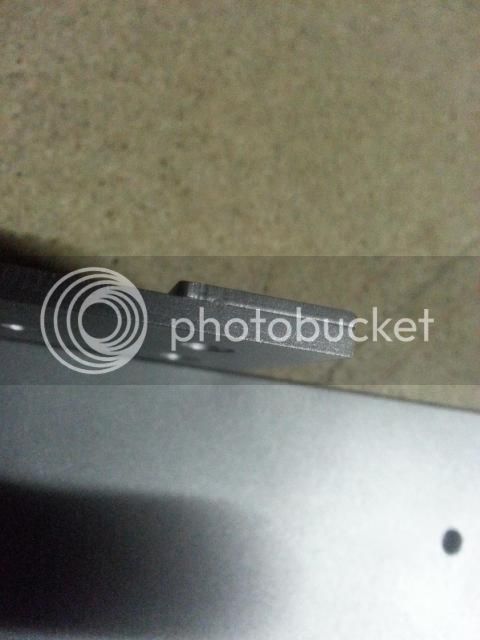
After tack welding, they looked like this:


The square tubes were cut and blasted with a fine glass bead to remove the scale and prep them for welding.

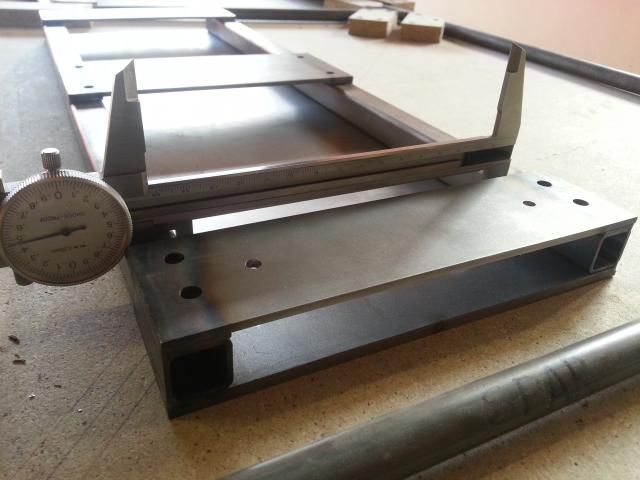
I didn't think to take a picture of the jig .... thing .... spacer in position before welding, but it was pushed all the way inside, between the square tubes. The picture shows it before it was pushed all the way inside. A bit like this:


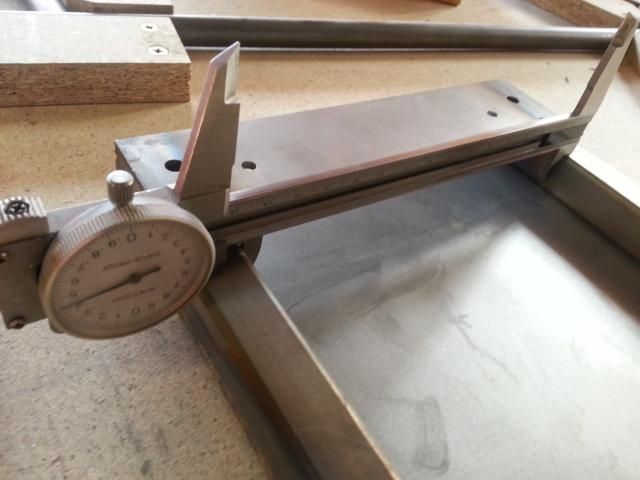
The rear plate was welded to the square tubes first, the cap plates with the spacers already tacked went on afterward. I clamped the whole assemble together in a bench vice with blocks of wood to protect the parts. Each part was fitted one at a time in the vice. It took around six or seven hours of clamping and tapping with a small hammer to get things properly aligned and tack welded. I used a vernier to check after each tap with the hammer. A steel ruler was used to check that everything was straight too.
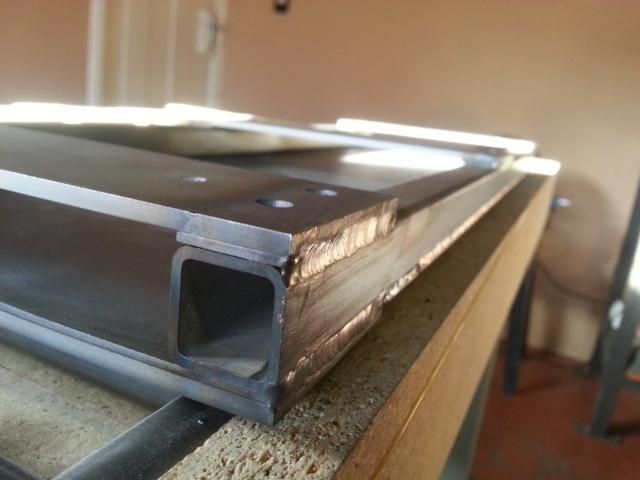
The two top square tubes were tacked together to within 0.2mm across the full length. This was before it was fully welded. I was sort of happy with that.
Stefan over at Kitplanes for Africa kindly helped to weld the entire assembly together. I explained that it was "almost parallel" but was rather concerned to hear that the heat from the welding would distort it anyway, so the level of accuracy I tried to achieve really wasn't required.

They did a FANTASTIC job!


It actually didn't distort much at all after welding.
The square tubes are exactly parallel.


Many thanks to Stefan from Kitplanes for Africa for his assistance.
 
The Main Spar Carry Through interrupted my progress with the fuselage, because I need to finish it first to determine the gap between two tubes on the fuselage.
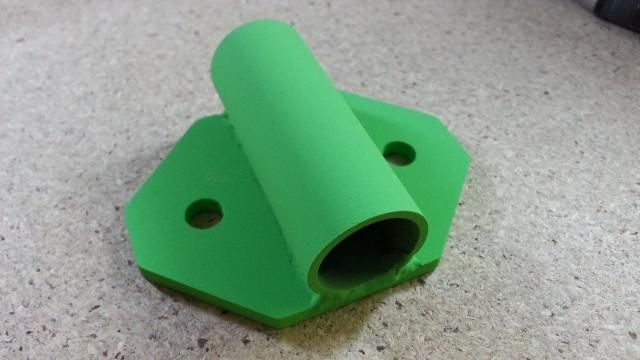
Now that it's done, complete with with a sexy coat of green zinc chromate, I could focus on the fuselage again.

All of the tubes were previously cut and notched and have been on the jigging table waiting to be welded for months now.
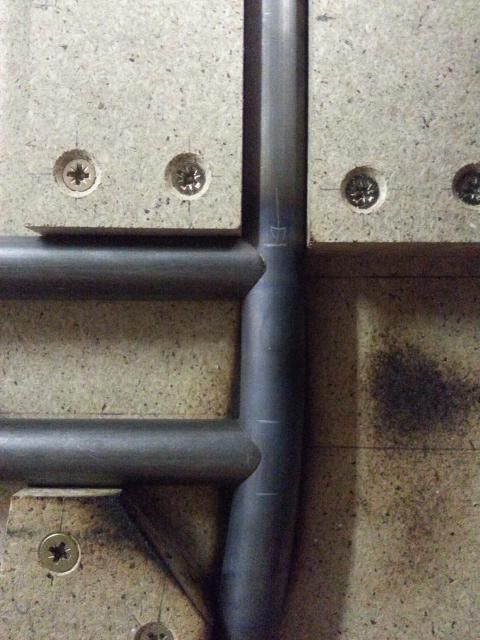
The tubes still had to be drilled at each intersection to allow the hot gasses to escape during welding, and also to allow the linseed oil, which will eventually be poured into the structure, to flow between the tubes. Each tube was carefully centre punched, and was drilled with a 2mm drill bit.

To find the hole center, I turned up a pencil holder to the diameter of the truss tubing, and put a hole in it to clamp one of those silver welding pencils.
It was then fitted between the various table blocks and rubbed up against the corresponding tube.


They came out looking like this:


In terms of time, it took two evenings to mark, centre punch and drill one side truss.

Before tacking, all of the tubes were blasted with glass bead to remove the mill scale from the tubing.
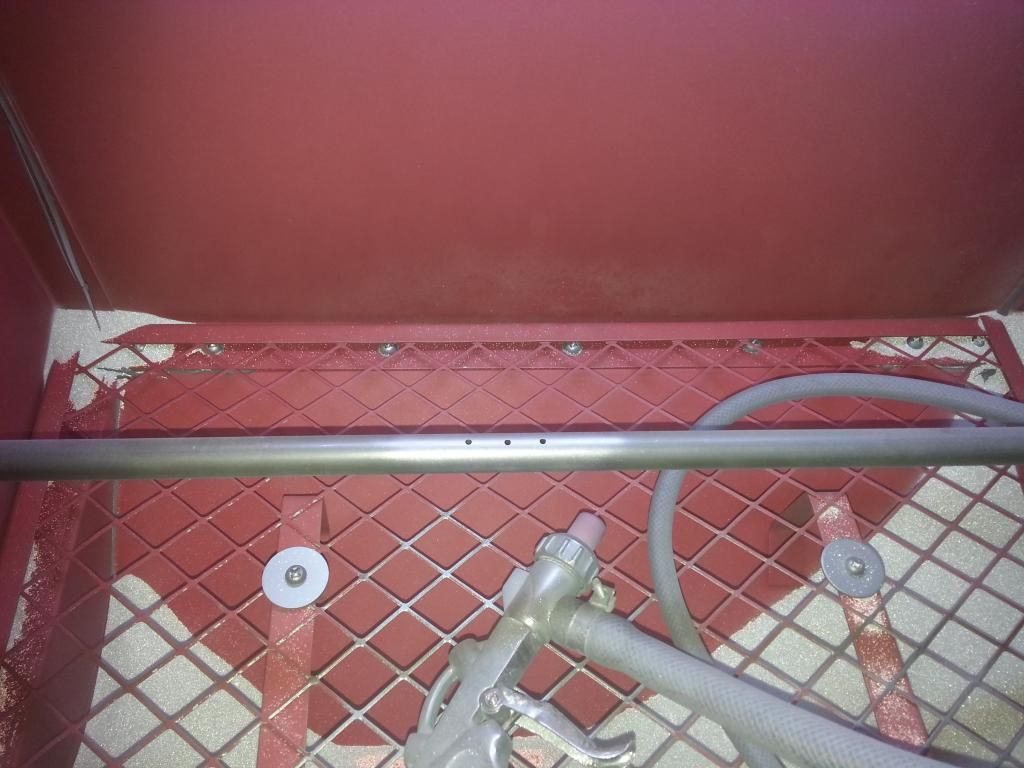
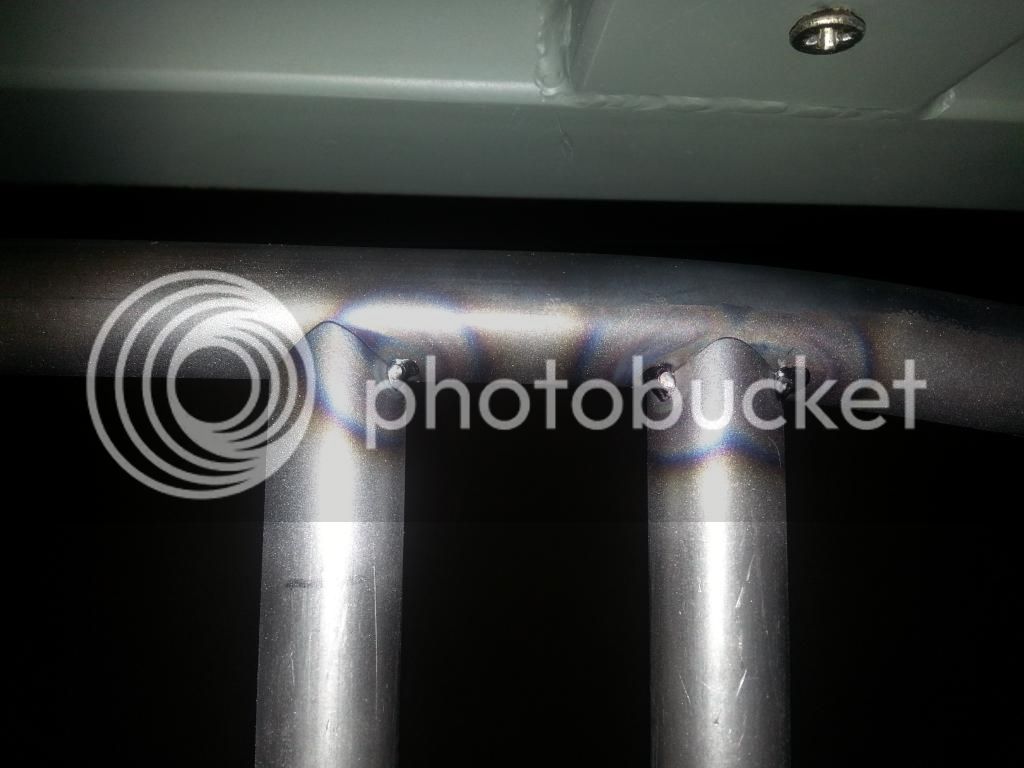
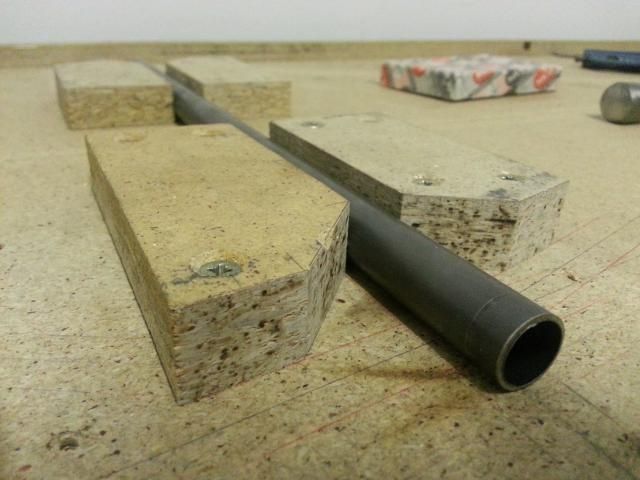
Some of the tubes were too long to get into the blasting box, so I drilled a hole on either side to push the tubes through the side. They were later plugged with cap screws. (visible in the pic)


Bits now look like this:


Time to tack it all together ......


Hi guys,

It’s been a while since this was last updated. So much has happened.... but sadly little on my beloved Sonerai.
I won't bore you with the details.... and I really have run out of Kleenex.... but I have managed to contract AIDS. Yip! That’s right ...the dreaded Aviation Induced Divorce Syndrome. [That's not what really happened, but we'll leave it at that.]

My mistress (the lovely Miss Sonerai) and I were asked to leave the matrimonial home and take up residence elsewhere.
We were SHOCKED!!!

I was told to expect setbacks.... but come on.... SERIOUSLY!

Sadly, the project stalled for four months.

I managed to move the project into an unused office at the end of the passage at work. From a luxurious double garage dedicated solely to the project, to an office the size of a single garage. It has had its challenges.

I truck was hired to move the jigging table from the house to my place of work. It was offloaded in the workshop and remained there for all of ten minutes, until someone (stupid fart) tried unsuccessfully to put a coffee cup on it. It was swiftly moved into the open plan office for a few days, until my colleagues started complaining about it. Not sure why really, it is after all a MASTERPIECE.
This is where it got complicated. We couldn't get it to fit through the doorway in the designated office. A glassier was called out to remove the glass so that we could pass it through the window. Yip ... the security bars had to be removed first and re-welded afterward. It was about as easy as clubbing baby seals to death.

Thereafter, it took two whole days to get it levelled again. Somehow, it managed to get twisted in the move, and had to be bolted to the floor to pull it straight.

The first of the two fuselage sides was completed in August of 2014. It took about a year to complete. Sure, the spar box and tube notching machine were also built during this period, and the table had to be blocked up. It took a while, and I think a lot was learned.

The second one went together fairly quickly. I'll try to describe it step by step.

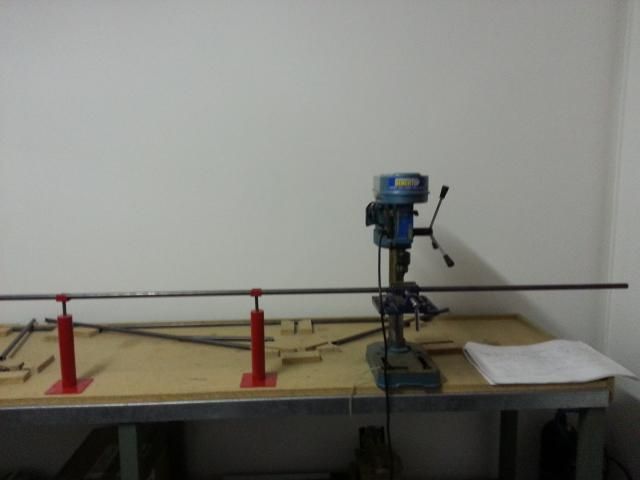
It took one evening and a few blisters to rough cut all of the tubes to the correct lengths with a plumber’s tube cutter. Another to bend the bottom longeron, and probably three days to notch all of the tubing. It was once again done with my home made tube notcher.


Another whole day was spent drilling the 2.0mm holes to allow the welding gasses to escape, and for the linseed oil to traverse after it's all closed up.
The positions were marked as per a previous post with the pencil in the sleeve. All marks were then centre punched. The longerons were a little awkward to drill, but it was simple enough to do, it just took a little time. (Please excuse the poor picture quality)



I also managed to blast all of the tubing with glass shot in the same day.

Welding, oil, and glass dust don't work well together. The tubes were cleaned inside and out with acetone the next day. The outside is dead easy. The inside was done by pushing paper towel rolled into little balls through the tubing with a filler rod. I found that repeating the process between four and five times seemed to work well. The balls were soaked in acetone.


I made a point of not touching the sand blasted areas with bare fingers. This was to ensure that the surface has absolutely no oil on it all. Almost sterile if you will.
They came out looking something like this:


After the jigging table was vacuumed to clean up the dust and get rid of the debris, the tubes were re-fitted into the jig, this after a quick acetone cleanup again. I know ... It sounds anal!
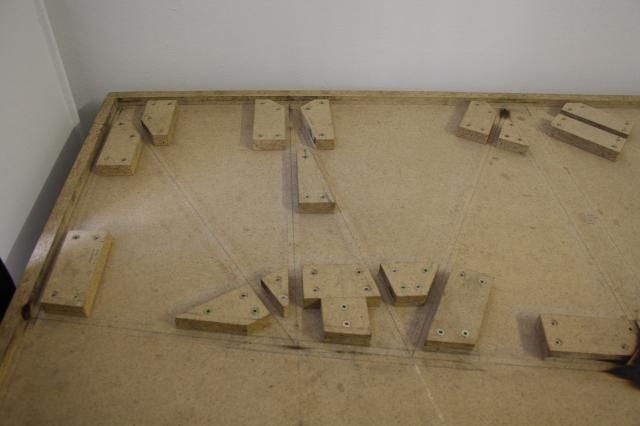
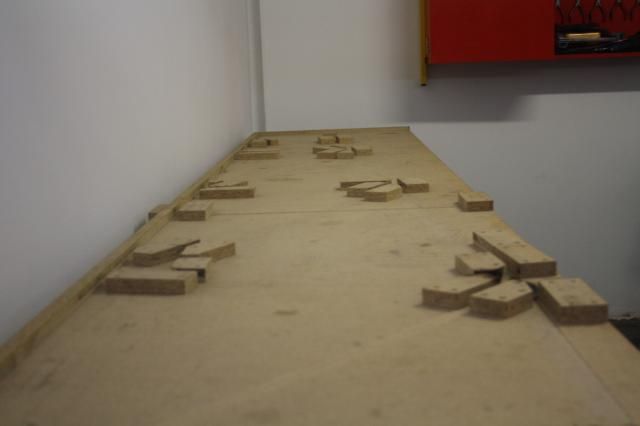


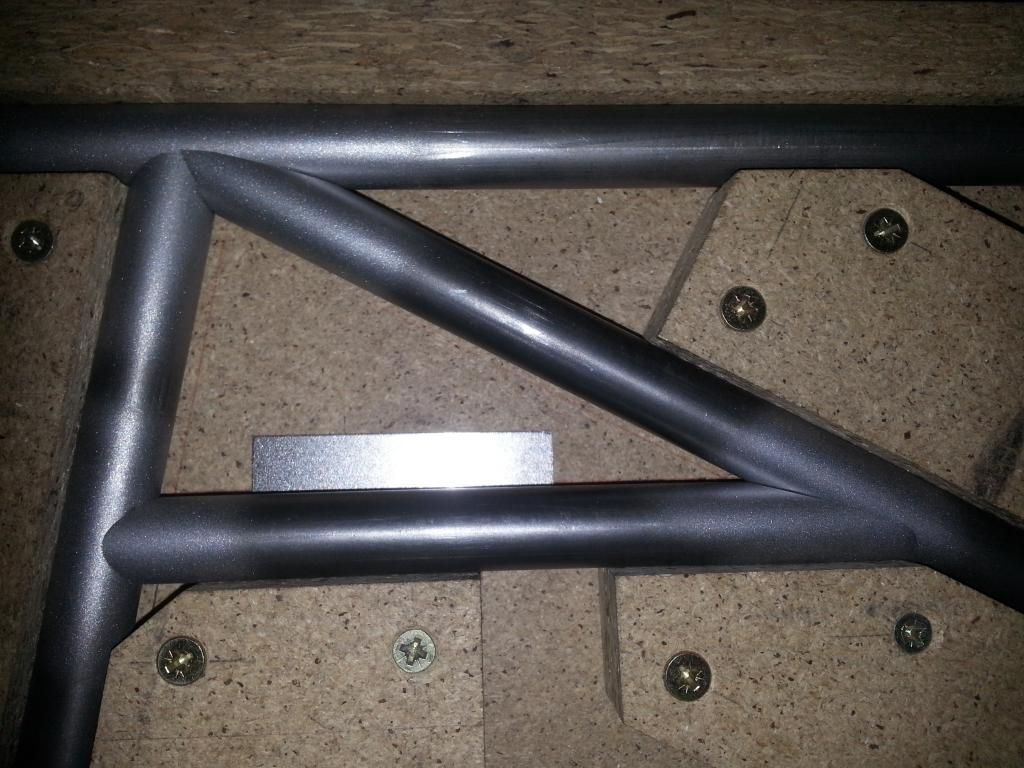
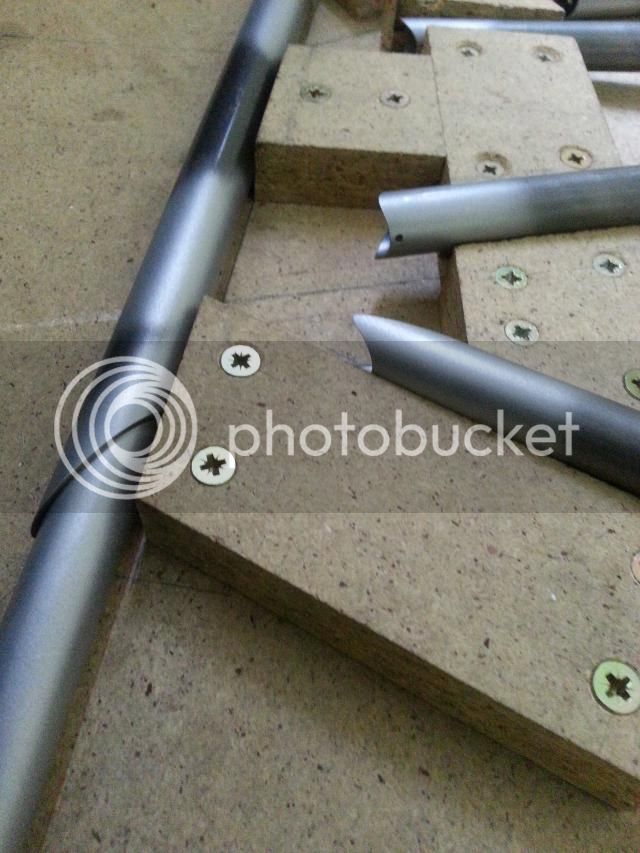


Note the 1.6mm packer plates under the 5/8" tubing. This was to raise the structure off the table, all to clear the small 3/4" sleeve tube which reinforces the landing gear. A total of 34 off packer plates were used.

I used the same spacers to separate the tubes that support the spar box. They have rusted somewhat since they were last used.


The actual tacking process took about an hour to complete using a TIG setup.

One note that's worth a mention. The last diagonal tube was fitted, BUT NOT TACK WELDED at this stage. I left it unwelded so that when the time comes to level the horizontal stabilizer, the fuselage can be twisted slightly if necessary. I actually left a bit more clearance on the notch for this purpose.


The second complete fuselage side took just eight days to complete.
In this time, my four year old and I still managed to build his aeroplane.
 
Hi guys,

I love December. Its summer over here, I'm on leave, and have been living in a tee shirt and flip flops for .... hek, WEEKS! I actually can't remember when I last wore a pair of shoes. There's also been plenty of time to work on my Sonerai.

Yesterday marked the end of an era. The days of walking on over to my jigging table and finding it set for the fabrication of the sides are over. It was blocked up like that for about a year. It was a little hard for me to remove all of the wooden blocks and clean it up. Anyway, Kleenex aside, it had to be done.

Once all of the blocks were removed, the table was vacuumed, and the pencil lines that were drawn for the sides were erased. Yip ... you guess it. Vacuum time again.
I started out by drawing a centre line on the table. My ruler is just two meters long, and the table is over four. I wasn't sure that the centre line was straight, so a line was pulled across the table, and the pencil line was checked with a set square. After a few attempts and half an eraser, I managed to get it reasonably close to spot on.
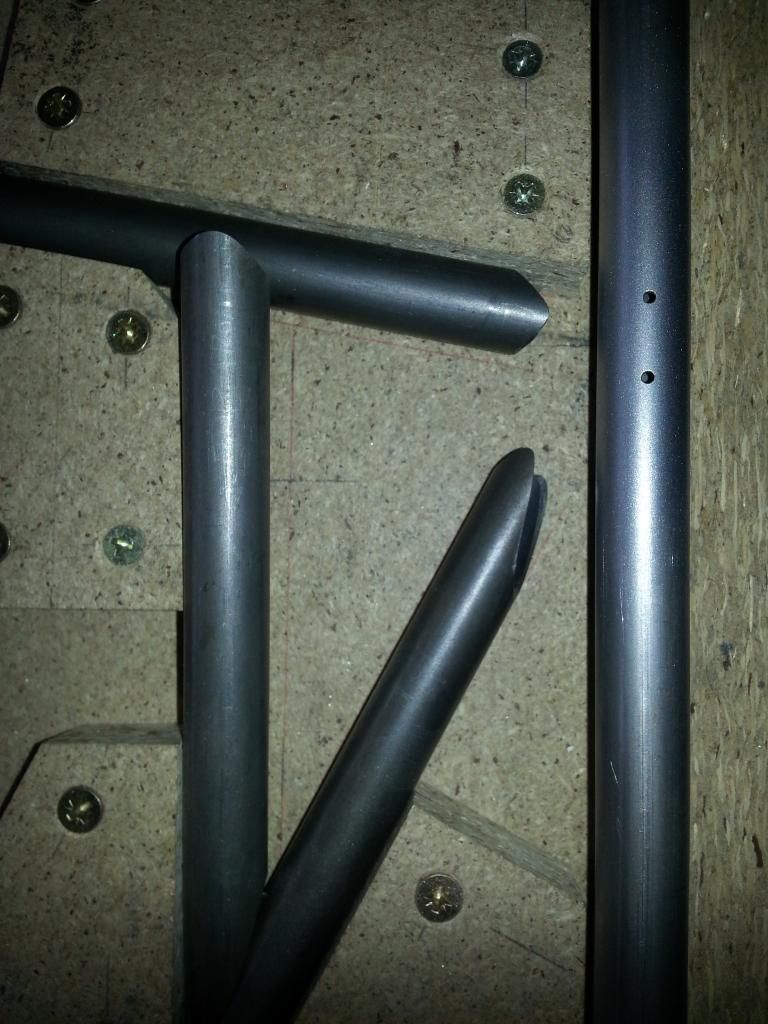


Next up, some wooden blocks were shaped, drilled, and screwed to the table to support the cross tube at station 6.


This took up most of the day.
 
You know those mornings when you're standing in the shower, and something just comes to you ..... (Try not to imagine this too hard ... please!)
I have been trying to figure out a way to jig the two fuselage side trusses to the table, upside down of course, so that they are as square and straight as possible. The idea came about while I was rolling the soap in one hand ... go figure!

I dashed out the shower, chucked on an old tee shirt, a pair of flip flops and ran out to work, forgetting to have breakfast. (This idea was way cooler than breakfast)

The jig fixture was drawn up in about an hour.


I haven't actually cammed, or programmed a CNC laser in a months. This proved to be the height of frustration. The company is closed, and the "know it all" youngsters who could have helped are on a beach somewhere. Gutting fish is more fun. This "quick" process took me around an hour and a half. The "know it all" youngsters manage to spit stuff like this out in five minutes. Anyway, I grind my teeth and figure that I learned something.


The controller on the machine had a few more buttons than I remember too .... The darn things sprouted like mushrooms. Got it going though, after a call or ... ten to the "know it all" youngsters on the beach.


Bending the parts was fairly easy..... When I managed to find the tools to change the vee block and top punch that the "know it all" youngsters hide away in a "safe" place.

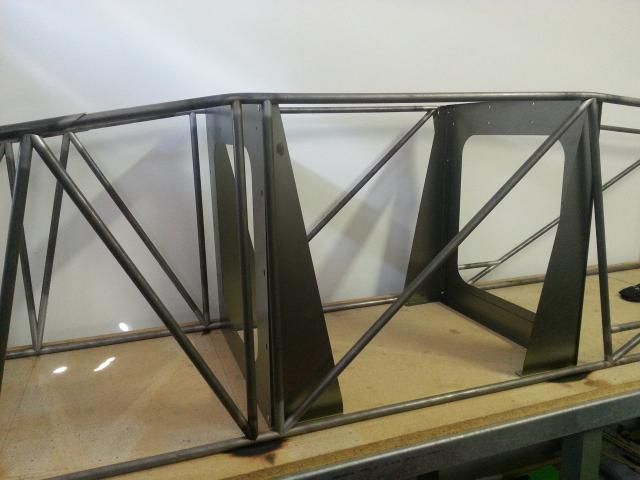
It came out looking something like this:


I have actually painted half of the parts with zinc chromate, but got so carried away with the stuff that I forgot to take pics.

Easy stuff. It was finished by 15h00. (less half of the paint … I ran out)
 
Back
Top